


Get ready to embark on the ultimate adventure with this thoughtfully planned South Island road trip itinerary in New Zealand. Discover the unparalleled beauty of Fiordland National Park, be awestruck at the majestic Mount Cook, and dance around the lupin fields along the way. Get ready to immerse yourself in the diverse landscapes of Milford Sound, Aoraki Mount Cook National Park, the glacial lakes of Lake Tekapo and Lake Pukaki, the charming coastal towns and more.
So pack your bags, buckle up and prepare for an unforgettable road trip adventure through the breathtaking landscapes of New Zealand’s South Island.
*Disclaimer: This post may contain affiliate links. Please see the full Disclosure Policy for details and as always, thank you for your support.
New Zealand Visitor Visa Information


A few years ago, New Zealand began requiring a NZeTA (New Zealand Electronic Travel Authority) prior to arriving in the country. This is very easy to obtain from the New Zealand immigration government website. The NZeTA costs NZD $100 and you will receive the confirmation email within 72 hours of applying. In addition, most people traveling to New Zealand will need to pay the International Visitor Conservation and Tourism Levy (IVL) of NZD $35.
To find out if you need to pay the IVL you can check the government website. Through the official New Zealand immigration government website you will be able to apply and pay for both the NZeTA and IVL during the same transaction.
On arrival in New Zealand, all visitors must complete a New Zealand Traveller’s Declaration card. This is separate from the NZeTA and IVL. You can either fill out the form online, complete the paper form on the plane or fill out one on arrival.
Must See Spots on New Zealand’s South Island


From the iconic Milford Sound to the vibrant turquoise waters of Lake Pukaki, this road trip itinerary takes you to the heart of New Zealand’s most mesmerizing destinations on the South Island. A place where you can truly say the journey is just as thrilling as the destinations themselves.
Lake Tekapo


Lake Tekapo is one of two popular lakes situated in the Mackenzie Basin near New Zealand’s Southern Alps. Known for its turquoise-blue colored water, scenic vistas and numerous outdoor activities, Lake Tekapo is the perfect start to your South Island road trip.
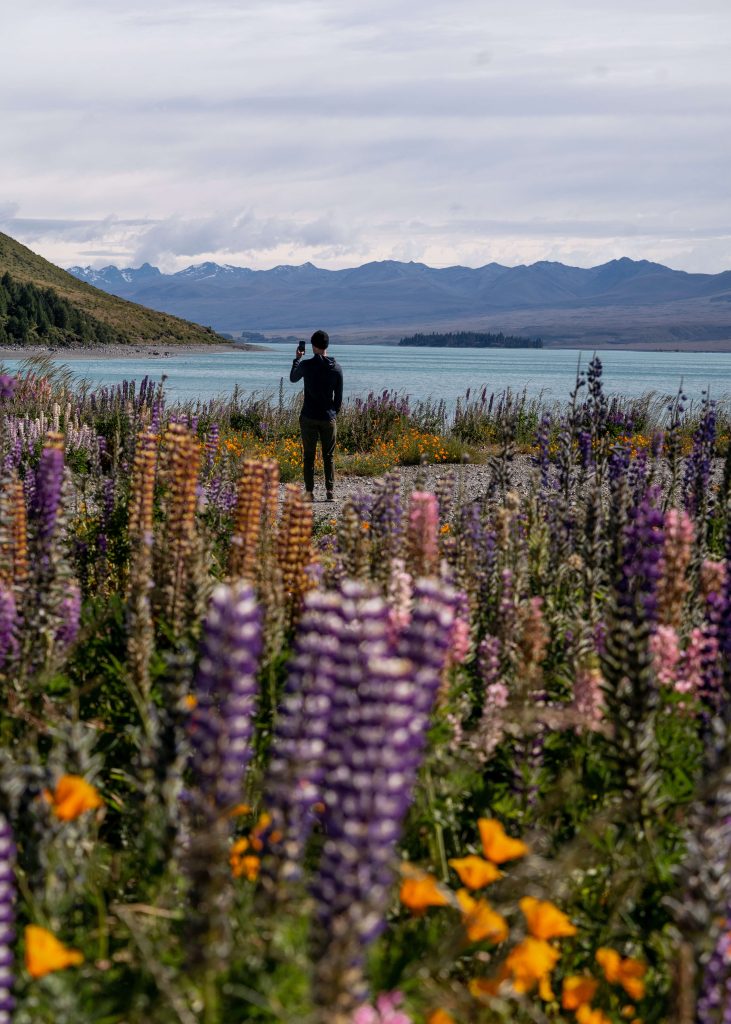
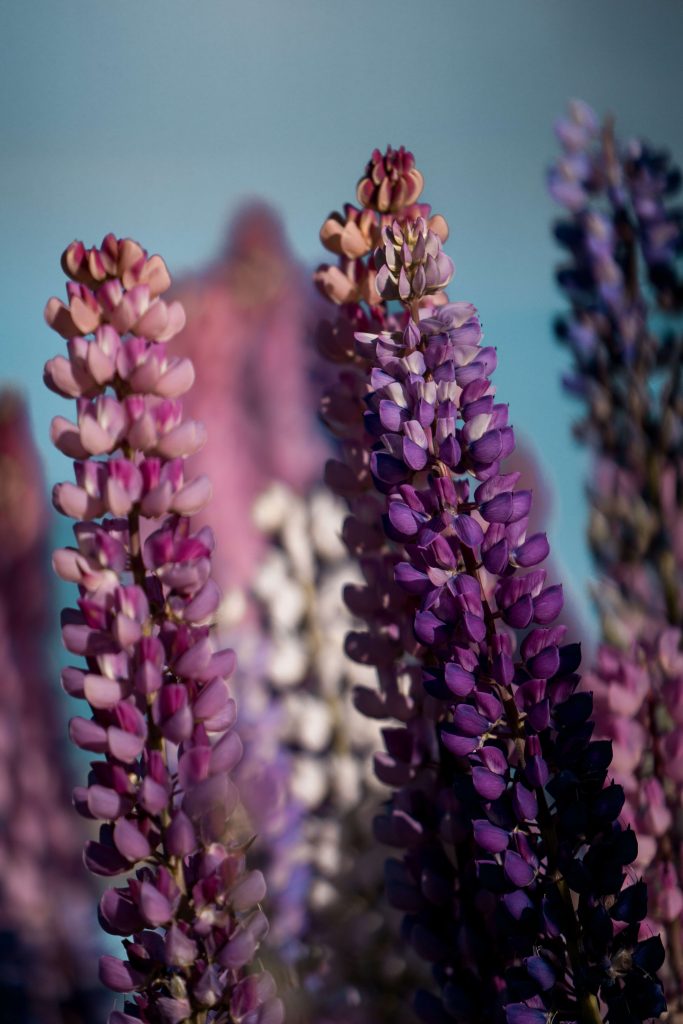
Spend the night at the Lakes Edge Holiday Park Camping Grounds, then head down to the waters edge for sunrise. There is a walking path that traverses alongside the lake directly across the street from the camping grounds. This area is wildly known for its’ colorful alpine flowers, particularly the pink and purple lupins that bloom during the summer months.
Lake Tekapo is notably one of the best places on the South Island for stargazing due to minimal light pollution. So if you have a tripod, this would be the perfect location to practice some astrophotography!
Lake Pukaki


Lake Pukaki is one of New Zealand’s most recognizable and stunning glacial lakes renowned for its vibrant, turquoise colored water. This large lake is fed by meltwater from the Tasman and Hooker Glaciers, located in the Southern Alps alongside Mount Cook.
The bright blue color of Lake Pukaki (and Lake Tekapo) is due to the presence of glacial flour, consisting of finely ground rock particles that are suspended in the water. Explore the areas surrounding the lake to discover breathtaking viewpoints to admire unique perspectives of New Zealand’s highest peak, Mount Cook (Aoraki).


There are several locations where we captured some incredible photos of Lake Pukaki, Mount Cook and the blooming lupins. Directly off of NZ HWY8, you’ll turn right on Hayman Rd and continue driving about 2km. Here you’ll find a small pullout, a field of lupins and captivating views of the lake. We spent a few hours here one morning, making breakfast in our camper van and enjoying the sounds of nature.
Another incredible viewpoint is from the Punatahu Visitor Center. It is located at the head of Lake Pukaki with a direct view of Mount Cook. While you’re there, pop into the Mt Cook Alpine Salmon Shop for some delicious, fresh and inexpensive salmon sashimi!
Also, if you are in a certified self contained campervan I highly recommend the freedom camping spot located directly on the lake.


The best time to see the lupins on New Zealand’s South Island is from the middle of November to the end of December.
Mount Cook/Aoraki


Mount Cook, known as Aoraki in the Maori language, is New Zealand’s highest peak. Standing tall at 12,218 feet (3,724 meters), this snow-capped mountain is located within Aoraki/Mount Cook National Park. A scenic 45 minute drive along State HWY 80 from Lake Pukaki and you’ll arrive at Mount Cook Village, the starting point for all activities within the National Park.
The entire area within Aoraki Mount Cook National Park will leave you awestruck. You’ll see lakes with icebergs, rugged peaks, glaciers and alpine meadows just waiting to be explored! There are a wide range of outdoor activities including scenic flights and heli-hiking, although traditional hiking is the most popular.


While there are many hikes in the area, the main ones are Hooker Valley Track, Mueller Hut Route and the Tasman Glacier Lookout. These 3 hikes have varying levels of difficulty but are suitable for most skill levels without requiring any special gear. If you have limited time in Aoraki Mount Cook National Park I’d recommend the Hooker Valley Track and Tasman Glacier Lookout.
Quick overview of the 3 main hikes within Aoraki Mount Cook National Park:
HOOKER VALLEY TRACK
- Distance: 6.2 mi (10 km)
- Duration: 2-3 hours round-trip
- Elevation gain: 328 ft (100 meters)
MUELLER HUT ROUTE
- Distance: 5.28 miles (8.5 km)
- Duration: 6-8 hours round-trip
- Elevation gain: 3445 feet (1050 meters)
TASMAN GLACIER LOOKOUT
- Distance: 0.62 miles (1 km)
- Duration: 1 hour round-trip
- Elevation gain: 328 ft (100 meters)

Make sure to stop at Peter’s Lookout for that iconic winding road shot with Mount Cook looking impressive in the background!
Omarama Clay Cliffs
The otherworldly landscapes of the Omarama Clay Cliffs are formed from layers of silt and gravel that were deposited by glacial processes over millions of years. Over time, the erosion from the wind and water carved the cliffs into the pinnacle-like projections and ravines that are there today. The unique geological formation is located in Omarama, a small town on New Zealand’s South Island.


You’ll pass through along your drive from Lake Pukaki to Wanaka, making the cliffs a worthwhile detour. Wander along the unpaved path leading up to the towering formations and enjoy the panoramic views of New Zealand’s countryside.
Glenorchy
The charming coastal town of Glenorchy, situated at the northern end of Lake Wakatipu, is nestled amongst the Richardson and Humboldt mountain ranges. Glenorchy is an absolute must visit if you are in Queenstown, as the 45 minute drive itself is known as one of the most scenic in the world. While there isn’t that much to do here, the laid back atmosphere and surrounding landscape makes Glenorchy a favorite town for visitors and locals alike.


A short walk from the center of town you’ll find the red Glenorchy steamship depot and the start of the Lagoon scenic walkway. In town, be sure to stop in at Mr Glen’s Taphouse & Tapas for a local brew and some nibbles. Another charming shop to visit is Mrs Woolly’s General Store, although they were closed during our time in Glenorchy.
Milford Sound


Milford Sound is a place that must be included in your New Zealand South Island road trip itinerary. This breathtaking fjord, located in Fiordland National Park is known for its’ impressive landscapes and cascading waterfalls. Milford Sound is the only fjord that is accessible by car making it very popular despite its remote location.
The closest town is Te Anau (1 hr 40 min away) so you’ll want to fill up on gas and food before driving into Fiordland National Park. There is a paid parking area with a visitors center, restrooms and small cafe when you first arrive in Milford Sound. You must park here and walk to the cruise ship docks as there is no parking allowed further in.


One of the best ways to experience the unparalleled beauty of Milford Sound is by taking a scenic cruise. There are many boat companies offering similar cruise options including duration, price and route. The cruise sails through the gorge making its’ way out towards the Tasman Sea while passing by towering cliffs and cascading waterfalls. You might even be lucky enough to spot some Fiordland crested penguins and fur seals along the way!
Milford Sound is considered one of the wettest places on the planet. Therefore there’s a good chance that you will encounter some rain during your visit unless you’re lucky like us with a sunny day. Either way the views in Milford Sound will leave you awestruck and absolutely mesmerized.
Some of the best things to do in Milford Sound:
- Scenic cruise
- Kayaking
- Milford Discovery Centre and Underwater Observatory
- Milford Track (hiking)
- Helicopter tours and scenic flights
Wanaka
Wānaka (pronounced with a long A sound) is a picturesque town in the Otago region of New Zealand’s South Island. Surrounded by the Southern Alps and situated on Lake Wanaka, the area offers visitors an abundance of outdoor activities including the popular Roys Peak Track.

The Roys Peak Track is a very challenging, strenuous trek with 4,030 feet (1,228 meters) of elevation gain. The total distance is 10 miles (16 km) and takes about 6-7 hours. We are avid hikers in Colorado and wrongly assumed that the Roys Peak Track would not be that difficult. I’m here to tell you, it was. Make sure you pack plenty of water, snacks and wear comfortable shoes. The hiking trail is well maintained so hiking boots are not necessary.
Since the first section of the hiking trail is on private land, the path is closed from October 1 until November 10 for lambing. If you go after lambing season you’ll see lots of baby lambs nibbling grass along the trail.


The panoramic views from the top of the Roys Peak Track are absolutely magnificent, making it worth the long trek to the top. If you hike the trail on a sunny day you’ll be rewarded with views overlooking Wanaka the entire journey. Of course the biggest reward is the view from the top!
That Wanaka tree is a lone willow tree that sits semi-submerged at the southern end of Lake Wanaka. Set against sweeping views of the Southern Alps, the unique tree is one of New Zealand’s most photographed natural phenomenons.


Before leaving town, stop in one of Wanaka’s local breweries or cafes! After our long, grueling hike up Roys Peak we popped into Rhyme x Reason Brewery for a few pints. It also happened to be open mic night, so we ended up staying to socialize with some friendly locals!
Hokitika Gorge


The Hokitika Gorge is a unique, geological formation located on the west coast of New Zealand’s South Island. The gorge walk is an out and back, easy trail suitable for all fitness levels. Passing through some of New Zealand’s native temperate rainforest landscapes, you’ll eventually come across a lengthy suspension bridge. Previously there were two suspension bridges that visitors could cross but the second one is currently closed. From the parking lot the trail is 1.5 miles (2.4 km) round-trip.
Your first views of this incredible natural formation will be from the suspension bridge, where you’ll admire the stark contrast between the vibrant water color, the white limestone cliffs and the lush greenery. The turquoise water is a result of suspended glacial flour in the river. The same effect as Lake Tekapo and Lake Pukaki.
As you continue on, you’ll get glimpses of the turquoise-blue water from various sections of the trail. Once you reach the end there will be a viewing platform, as well as steps that lead down to the rocks below.


As a warning, this was one of the only locations on our New Zealand road trip where we encountered a massive amount of sandflies. Make sure you wear insect repellent and long clothing to ward them off as best you can.
How to Road Trip Around New Zealand’s South Island
Embarking on a New Zealand South Island road trip means one thing: ADVENTURE! While planning your itinerary you’ll want to determine the ideal transportation method for your road trip. Campervan hire is extremely popular in New Zealand for the unique experience and flexibility it provides. It is also a great option for budget-conscious travelers since it’s both your transportation and accommodation. Another bonus is that you can cook your own meals, saving money and time!

How to choose the right camper van and company?
Prior to choosing a camper van for your New Zealand road trip you’ll want to determine your specific needs for your trip. First, you’ll want to choose the right size camper based on the number of people traveling, as well as your comfort preferences. Also, settle on a budget beforehand because cost can vary significantly depending on several factors.
Are you traveling in peak season, picking up at one location while dropping off at another, or does the company include unlimited mileage? These are all things that you’ll want to take into consideration for your campervan hire New Zealand.


For our New Zealand South Island road trip we decided to arrive and depart from Christchurch. After researching different companies for our campervan hire Christchurch, we chose the Kuga Camper van from Traveller’s Autobarn. This van provided us with everything we needed for our week long road trip and was incredibly spacious for the two of us.
Additionally, we chose Traveller’s Autobarn because the company has other locations around the world and we prefer to use companies that we trust for our future travels. If you’re the same, you can book one of their camper vans in these incredible locations:


When renting a camper van in New Zealand consider extra add on insurances and the company’s hours of operation. Your credit card and car insurance may cover some damages, however most rental companies do offer additional insurance packages. It is up to you to decide whether you want to add on extra protection to the vehicle.
Typically, the camper van companies have specific hours of operation without the option of picking up the camper after hours. If you arrive outside their business hours window there will most likely be an additional cost and it will have to be arranged before your arrival.
Certified Self Contained camper van in New Zealand
A certified self contained camper van is a vehicle equipped with all the necessary facilities for its’ passengers while having a minimal impact on the environment. This designation is required in New Zealand to help preserve the natural environment and landscapes of the country. If you are unsure whether your campervan is certified self contained, look for the sticker adhered on outside of the van.


Key features of a certified self contained camper van:
- Toilet facilities: The camper must contain a toilet with privacy. We had a porta potty in the camper but never used it due to free restroom facilities conveniently located all over the country.
- Freshwater storage: There must be a freshwater container inside the van with a large enough capacity for basic needs. You can refill your freshwater supply at the paid campsites (holiday parks).
- Wastewater storage (greywater): In addition to the freshwater container there also needs to be a greywater container to collect the wastewater from your kitchen sink. You can dump the wastewater at holiday parks, as well as a few gas station locations in the bigger cities. Inside your van you’ll find two hoses: one to dump the grey water and one to refill the fresh water. They are labeled properly so don’t mix them up!
- Trash can: Or any place to store your trash until it can be disposed of properly. At the holiday parks you’ll see plenty of large trash bins to throw out your waste.
- A secured dining area: The camper van must provide a place to sit with a table. In our campervan, this space was converted into the main bed for sleeping.
- Sleeping facilities: All certified self contained camper vans must provide sleeping arrangements for all passengers. The Traveller’s Autobarn Kuga Campervan sleeps 3 with an extra bunk bed on top. You can add on the linens for a small fee.
- Screens and curtains: All camper vans must provide screens and curtains for privacy.
Our campervan from Traveller’s Autobarn was equipped with a full kitchen. It included gas propane burners, a sink, a small refrigerator and cooking supplies. We prepared all our meals in our campervan for the duration of our trip. The local PAK’nSAVE grocery store in Christchurch is the best place to stock up on food for your New Zealand South Island road trip!
Where to camp in New Zealand
When road tripping around New Zealand, you’ll find that it is very easy to find a place to park your campervan for the night. The country is dotted with numerous campsites whether it’s a paid holiday park or a designated freedom camping area.


The most convenient way to find your ideal camping spot is to use the CamperMate App. It’s free and details all the different camping locations around New Zealand and Australia. You can even use it to search for grey water dump stations, public toilets, petrol stations and more!It definitely came in super handy during our New Zealand South Island road trip!
Holiday parks
In New Zealand holiday parks are popular amongst travelers because they offer accommodation options including camping, cabins, and campervan parking. Holiday parks have bathrooms, kitchens, laundry and wifi for guests to use. Most of them also have fresh water and grey water dump stations which is convenient if you are doing a mix of holiday parks and freedom camping.
The cost for a campervan plug in parking spot averaged about NZ $50 for two people. Keep in mind that you need to be ‘plugged-in’ to use the microwave and some of the electrical outlets in the back.

Tip: pack a pair of flip flops or shower shoes for the holiday park showers!
Freedom camping
Freedom camping on New Zealand’s South Island allows travelers the opportunity to enjoy the natural beauty of the country while experiencing free camping. There are a few guidelines you’ll need to follow if you are freedom camping but they are pretty simple. You must be in a certified self contained vehicle and you are expected to follow responsible camping practices.


There are designated areas around New Zealand specifically for freedom camping. You are not allowed to just park anywhere so please be considerate of the rules and regulations.
ALL THE CAMPSITES WE STAYED AT DURING OUR ROAD TRIP IN NEW ZEALAND
- Lakes Edge Holiday Park in Lake Tekapo. Cost NZ $30 per person and included plug in for the campervan, 6 minute showers and toilets.
- Freedom camping spot on Lake Pukaki. No facilities except a minimal drop toilet but free with incredible views of Mount Cook. Search Freedom Camping for Certified Self Contained Vehicles Only on Google Maps in the area of Lake Pukaki.
- Freedom camping spot in Kingston on Lake Wakatipu. Free for certified self contained vehicles only. Search Kingston Lake Camp on Google Maps to find this location.
- Wanaka TOP 10 Holiday Park. Cost NZ $55 for two people at a plug in spot. There are shower and toilet facilities.
- The Camp at Lake Hāwea. Cost NZ $49 for powered site including 2 people. Shower, toilet and kitchen facilities.
- Porter’s Lodge near Castle Hill. Super cute lodge with showers and toilets. Cost NZ $50 for two people and a powered site. No fresh water or greywater dump station.
Where to use toilet facilities and showers
In every town and at most tourist spots you visit, you’ll find a public restroom. All of the public toilets in the towns we stopped were clean and properly stocked with toilet paper. In fact, most of the public restrooms in general were nicer and more hygienic than anywhere else I’ve been in the world.


Showers are typically available at all of the paid holiday park campgrounds. Some may have time limitations on them but they are all included in the nightly rate of your stay. Again, I found all of the facilities in New Zealand to be very clean and I never had to wait to use the shower.
How to dispose of grey water waste and refill fresh water
When traveling New Zealand in a certified self contained campervan one of the things that you will have to do is dispose of the grey water waste tank and refill your fresh water tank. Most of the paid holiday park campgrounds will have an area where you can do this on your own.
However if you are freedom camping you’ll have to find somewhere to dump your grey water waste. DO NOT dump it in a non-designated area. As I mentioned previously, you can find stations using the CamperMate App if you are unsure.


To dump your grey water waste tank you’ll use the correctly labeled hose in your camper van and attach it to the proper tank. Then you’ll take the other end of the hose and drop it into a square opening in the ground with a grate on top. Let it drain until it is completely empty and then remove the hose.
Near the dump area you’ll find the faucets for fresh water. Take the hose from the faucet and insert it into the port on the side of your van which connects to the fresh water container. That’s it!
Gas stations in New Zealand


Petrol, or gas, stations are more prevalent and less expensive in the bigger cities. If you are passing through during your New Zealand South Island road trip I highly recommend filling up when you have the chance. Even if we had a half tank we made sure to fill up before heading out to the rural areas of the island.
In New Zealand you will typically fill your tank and then go inside to pay. A concept that is a little foreign to those of us coming from North America where you usually pay with a credit card beforehand.
Internet Service in New Zealand


Many traveler’s will choose to activate their international data plan through their phone service provider at home. However, this can be quite costly at $10 USD or more per day. Another great option is to purchase a SIM on arrival at the airport or download an eSIM. When we arrived at the Auckland airport there was a Vodafone kiosk just outside of where you exit. Their plans were still a little pricey starting at NZ $29 for only 2GB of data for 30 days.
Keep in mind that neither of these options will work if you have not paid off your phone through your cell provider. Your phone is still ‘locked’ and can only be used with your original SIM card. If you travel internationally a lot it might be worthwhile to either pay off your phone or just buy it outright from the manufacturer.

We used an eSIM in New Zealand, as well as on previous international trips we’ve taken. There a couple of companies out there but we have only used HolaFly. It cost about $37 USD for 7 days of unlimited data and comes with easy downloading instructions. When purchasing your plan you’ll select the country to which you’ll be traveling.
You can purchase and activate the eSIM prior to your trip or you can do it on arrival. If you wait until you arrive in your destination you’ll need to connect to the airport wifi so the plan can be activated. Just be sure to turn your cellular data plan OFF for your primary number and activate the data for the eSIM number.
Driving in New Zealand
Driving in New Zealand is easy as long as you remember that they drive on the opposite side of the road than you might be used to. The drivers seat is on the right side of the car, therefore you’ll need to ‘keep left’. Roads on New Zealand’s South Island are well maintained and wide, so you shouldn’t have any issues. Unpaved and winding roads are more common along the west coast, where it is understandably more windy. Therefore, drive the speed limit, be safe and as always, have fun.


When renting a campervan (or car) for your New Zealand South Island road trip you will only need an international driver’s license if you are NOT from Australia, the UK or USA. Since we are from the USA we did not need one.
New Zealand Seasons – Best Time to Visit the South Island
New Zealand is a beautiful place to visit year round depending on what you have planned for your trip. Each season offers something completely different. From skiing and snowboarding in the winter to hiking and boating in the summer, you’ll never run out of things to do on your New Zealand South Island road trip, no matter the time of year!


Remember that New Zealand is located in the Southern Hemisphere which means that the seasons are opposite than what most of us are used to!
Summer in New Zealand
Summer in New Zealand occurs from December to February. The South Island experiences warmer temperatures and long daylight hours. In the beginning of December, we experienced temperatures ranging from 50°F-80°F depending on the time of day and location. We also had extended daylight hours where the sun would rise before 6AM and set after 9PM. This was optimal for maximizing what we could do during our New Zealand South Island road trip.


One of the main highlights of visiting New Zealand at the beginning of summer is to witness the blooming lupin flowers. Lupines are an invasive species and not-native to New Zealand, however they bloom in abundance all over the South Island. You’ll find fields of lavender and magenta lupines scattered across New Zealand’s distinctive landscapes from mid to late November through early January.
Summer is peak season in New Zealand so it is best to make reservations for tours, camper vans, car rentals and hotels early.
Fall in New Zealand
Fall in New Zealand occurs from March until May and is considered the shoulder season. The warmer temperatures transition to cooler climates with average temperatures ranging from 40°F to 70°F. During this time of year you’ll witness the colorful fall foliage in shades of red, gold and auburn. Fall is a wonderful time of year to experience more peaceful hikes and activities, cooler weather and less crowds.
Winter in New Zealand
Most locations on New Zealand’s South Island experience a fairly mild winter unless you’re in the mountainous regions. The winter season occurs from June to August and has average temperatures of 40°F to 60°F. Tourism is typically reduced during this time of year with the exception of avid skiers and snowboarders. New Zealand has several world-renowned ski resorts in the Southern Alps including Coronet Peak, the Remarkables, and Treble Cone.
Be sure to pack plenty of warm clothing and prepare for shorter daylight hours during a New Zealand South Island road trip in the winter.
Spring in New Zealand


Springtime in New Zealand’s South Island is a beautiful time to visit when the country’s natural beauty comes to life after hibernating all winter. The days become longer and the temperatures slowly start to become warmer, ranging from 48°F to 65°F. The spring season occurs from September to November and is an excellent time for outdoor activities.
Spring is also the lambing season and you’ll likely see baby lambs out in some of the more rural areas.
New Zealand Drone Laws
Are personal drones allowed in New Zealand? The short answer is yes. However, all of the places listed above had NO DRONE signs posted so you can decide for yourself if it is worth it to bring on your trip or not.
Some other key points to consider with drone usage in New Zealand:
- Drones weighing over 250 grams need to be registered with the CAA and can be done online
- Drones must not be flown higher than 400 feet (120 meters) above the ground
- Drones must be flown within the operators line of vision
- Drones should not be flown near people, airports, aircraft and around other restricted areas unless you’ve received special permission
- Drones are not allowed to be flown in National Parks and Conservation areas
- DO NOT FLY your drone if there are signs posted that say NO DRONES – be respectful to the places you are visiting



Your pictures are stunning ! You do make me want to visit New Zealand !